


Viking Round Shield
 This Viking round shield was my first major project in terms of woodworking…and my first Viking age replica. I was advised and mentored by Ben Pyles, a Viking and SCA reenactor I met in my early introduction to Viking reenactment with The Vikings of Bjornstad. He gave me a list of materials and the use of his shop. As the shield was made some time ago, I will endeavor to reconstruct the order in which I completed it.
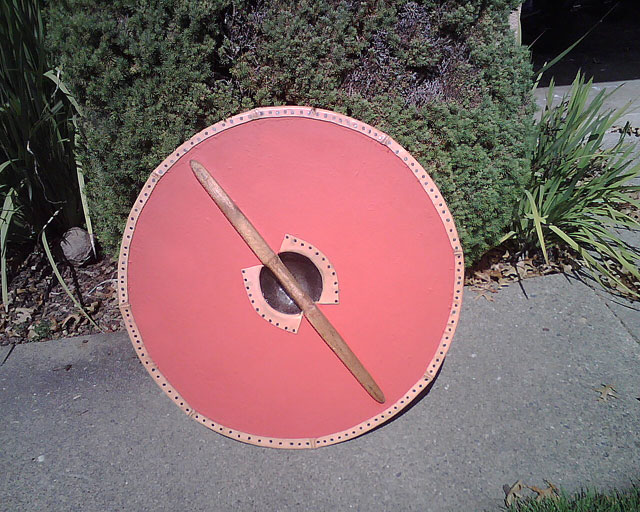
 First, I cut a round of 36″ diameter from 3/8″ marine plywood. Then I cut a 5-6″ diameter hole in the center of the round. Your mileage may vary on this, as the rule of thumb is the radius will be 2 inches beyond your measurement of the elbow to the grip of your hand and an object placed in it. Double that number and you have the appropriate diameter. Next, I sanded and filed both the inside and outside edges, rounding them to a half circle. After that, I sanded both the front and back of the shield blank, tapering it slightly towards the edge.
 The next step was to cut out circles from a painter’s linen canvas tarp with sufficient circumference to overlap the rim on both sides. Then, I “painted” one side with wood glue and carefully draped the circle I had cut onto the shield, smoothing it out as it came in contact with the shield surface. I cut the inside hole on the tarp piece to allow for an overlap and cut small incisions to be able to wrap the inside of the hole. I made the same incisions on the outer circumference, as well. I let it tack up and then “painted” the surface of the tarp once more. This should dry overnight. Then, repeat the process on the opposite side, so both sides are covered with linen.
Some thoughts here. You may wish to use linden wood or poplar planks that have been glued together on edge to create your shield. You may also wish to cover your shield in leather, or rawhide.
 While the shield was drying, I cut a length of oak into a handle shape, filing and sanding it, as necessary. There will be plenty of time to do this as the shield dries. Once the shield is dry, the handle can be mounted, using wood glue on the under side and square nails to secure the handle. Don’t forget to “clench” the nails! If you’re so inclined make a couple of square washers and place those on the face of the shield and use them as a base to peen the nail to, if you choose not to do the clenching method.
At this point, the shield should be painted with gesso as a preparatory surface prior to painting. Once it is dry, painting of your design can begin. I my case, I traced a raven from a pattern I had enlarged to fit the shield. If I were striving for historical accuracy, I might use milk paint, however, I had semi-gloss latex available and used it.
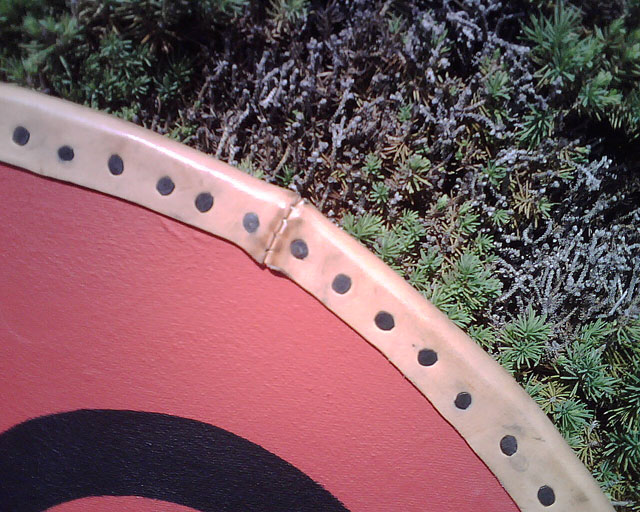 Now that the shield is painted and the handle is applied, decide if you want a rawhide or leather edge. I had leather available, and sewed it into a circular strap with an inch of overlap on each side of the shield. I made it smaller than the circumference, so I stretched it by soaking it in water and put it on the shield. Once it dried, it conformed quite nicely to the shield face. I secured it with carpet tacks, which look like small handmade nails. One can also drill holes around the shield and stitch the leather or rawhide into place.
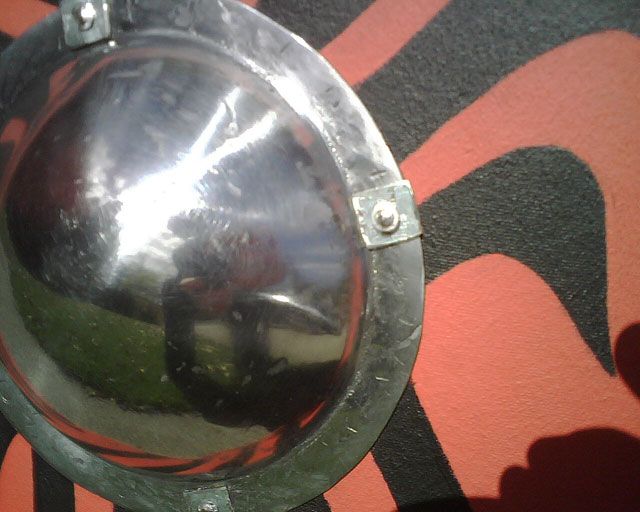
The last bit of business was to attach a shield boss. I pre-drilled the boss on 4 sides, and aligned it at 90 degrees to the handle. Then I marked the appropriate spots on the shield and drilled small pilot holes for a square nail. I also made 4 square washers, and peened the end of the nails as can be seen in the pictures below. Finally, I took another piece of leather and used it as padding on the back side of the shield and on the inner edge of the hole where my hand would fit. This was also nailed into place and also covered the nail heads for the shield boss.
This was made back in 2009. I still use it today. The boss is dented and has a small crack and it was touched up paintwise some years ago. It is still battle worthy.