


IRISH VIKING BOX POUCH
 In my pursuit of all things Viking, I sometimes go down the rabbit hole. In this instance, I almost bit off more than I could chew. Fortunately, I was able to solve the issue I had. Here’s what happened.
I follow a craftsperson/blacksmith on Facebook, as he produces interesting takes on things from the Vendel and Viking ages. I admire his work, so here’s where you can see more of it at Jorgencraft.com. One of the things he produced was an Irish Viking box pouch. I was very much intrigued by it and contacted the maker on a few occasions to ask questions. Of course, all really good blacksmiths will only give up part of their secrets. This was indeed the case, here. Regardless, I took it upon myself to learn more about said box pouch.

Researching images from the Irish Historical Museum (Irish finds, Kilmainham Island Bridge, Waterford), I discovered the source of his pouch. However, there was considerable interpretation on his part, as to be expected. All that was left for posterity were a few metal parts. Now, this sounded good to me, as I could use the process of experimental archaeology to produce a version for myself. To be honest, I did replicate some aspects of his pouch and I am indebted to him for “showing me the way”. That could not be helped, as there are functional items that are required.
 A bit of back story here…as my Viking impression was shaping up, I had become a Viking Shipmaster, one who had made a number of voyages to Dub Linn, a trade port in the land of the Irish. While others may holler “cultural appropriation”, I most definitely believe the Vikings brought back things from their travels and actually used them in their everyday lives. The fact that these items do not show up in burial sites can probably be explained by the deceased being buried in their finest, and richest garments and kit items. Yes, there are laws and cultural mores that might proscribe such a concept, but how would one explain Arabic coins, Buddha figurines, silk and other items from other cultures the Vikings visited? So, that’s my answer to that particular question.
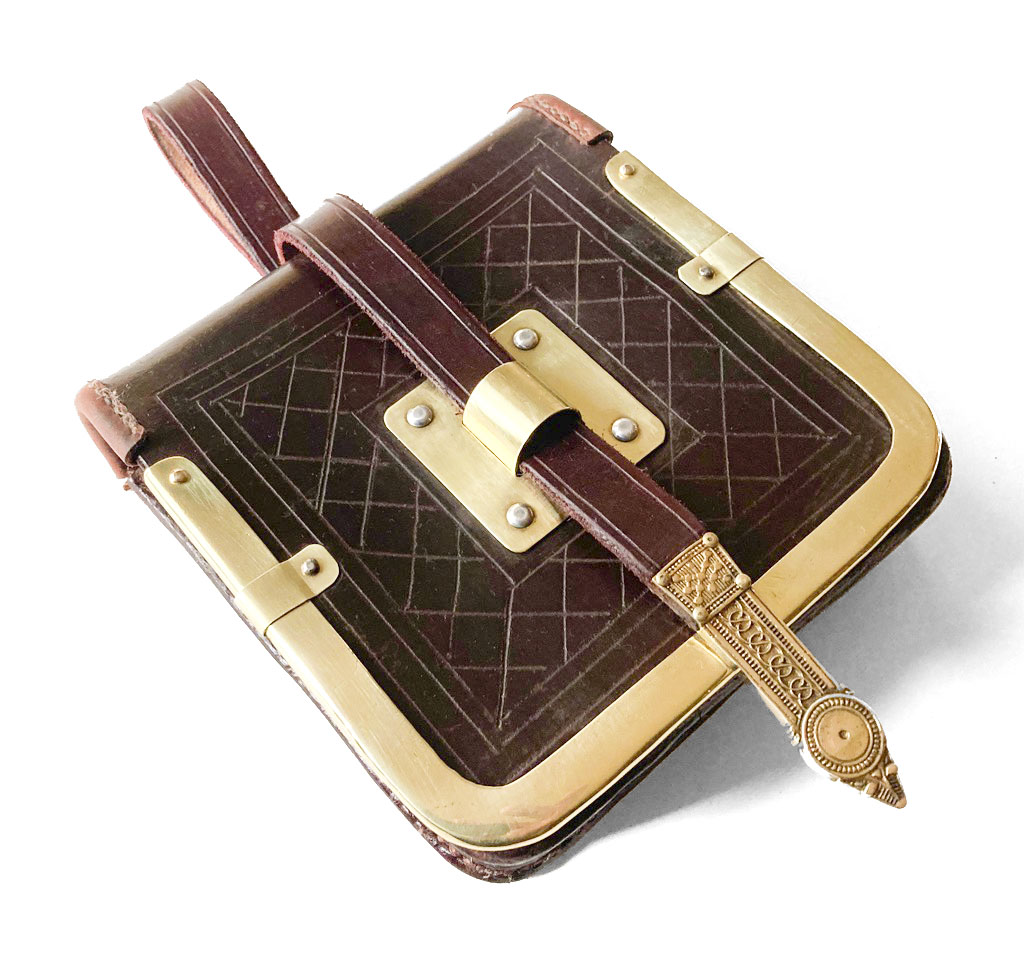
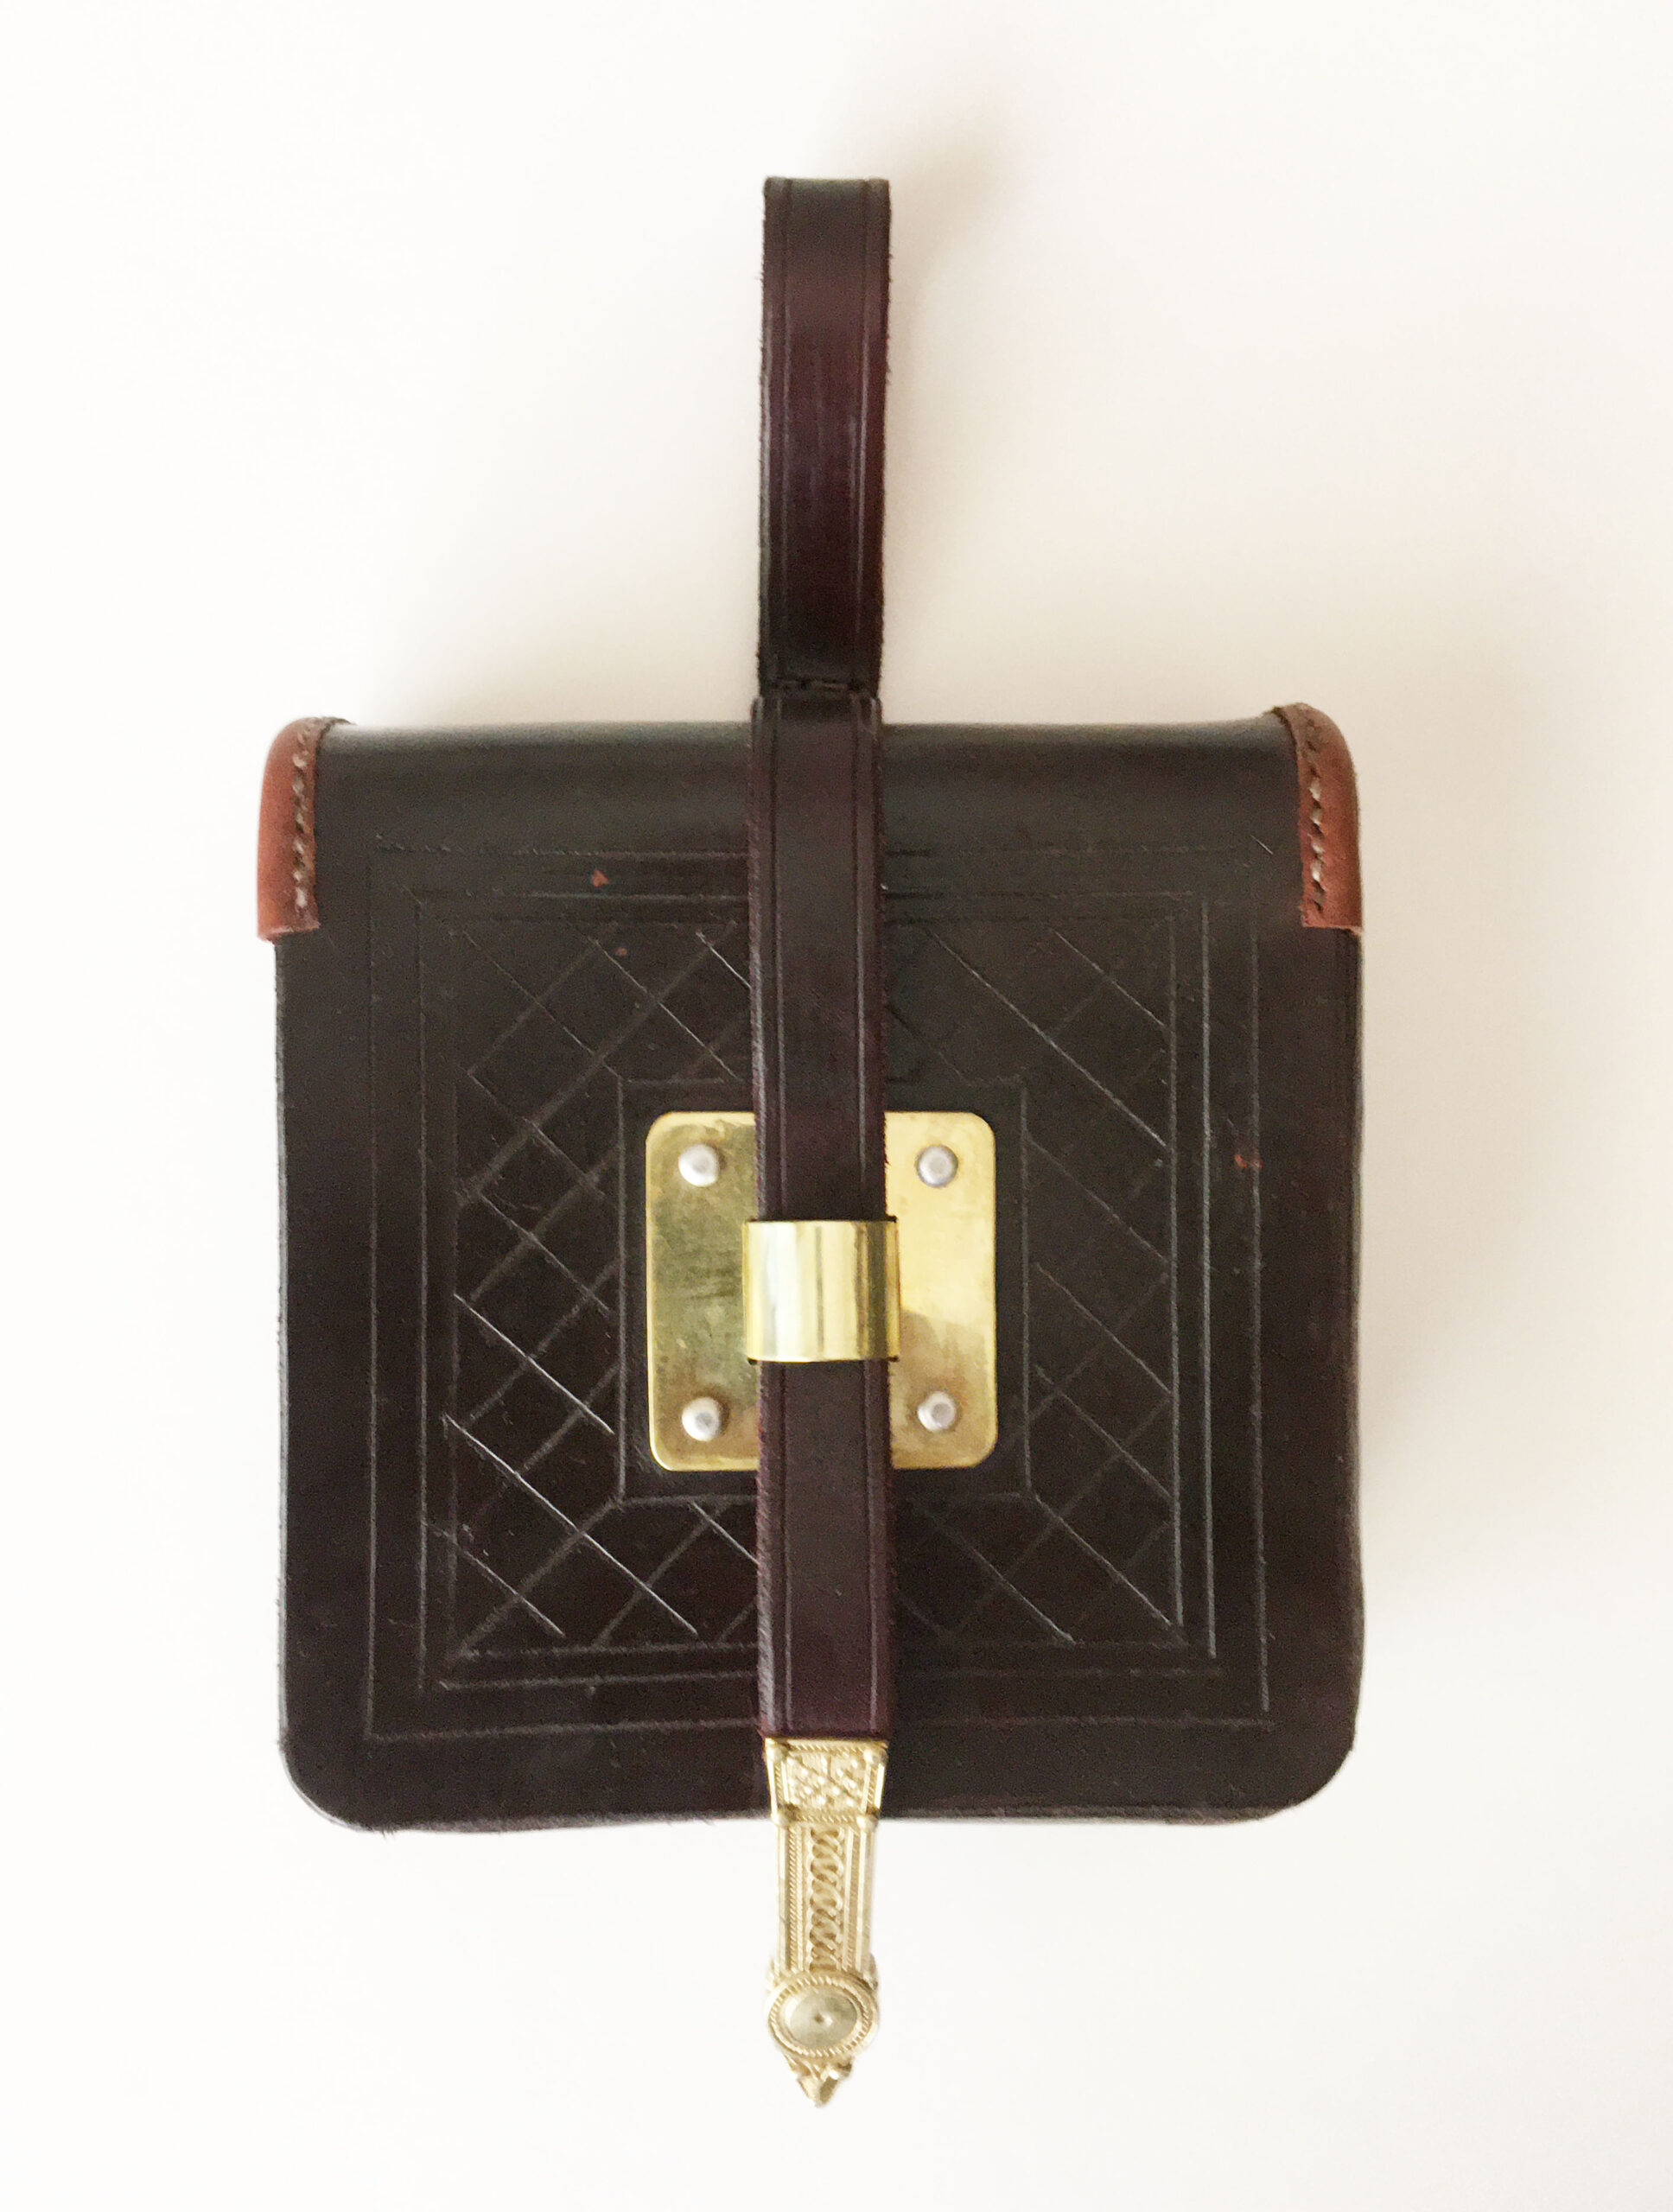
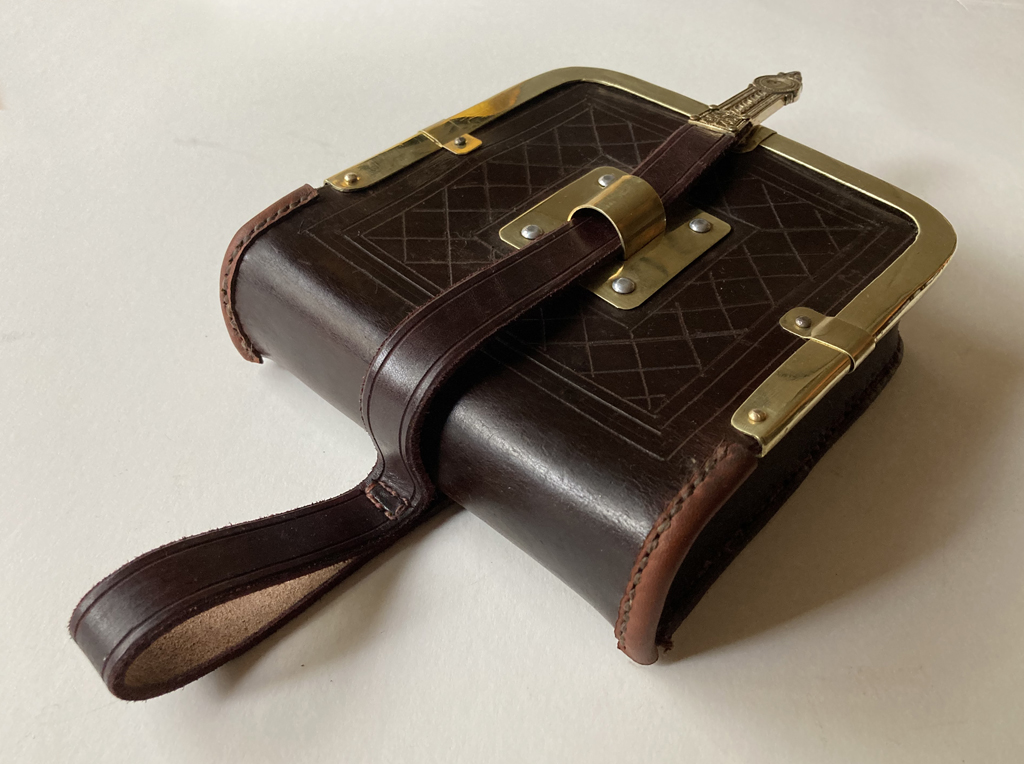
 On to the best part…”how did he do that?” Well, the leather part was pretty easy. I’ve been doing leatherwork for years, so sourcing, making a pattern and cutting the leather was no big deal. The dimensions of the pouch are 6″ x 6″ x 2″. Should you wish to try this, the total length of the leather is 22″. The two side pieces are 2″ x 6″. So, in total, about 26″ x 6″. I would also allow an extra 1/8″ to every sewn edge, too. You’ll need to cut the two side pieces and measure for the square hole that will be cut in the fold over part of the pouch. That should be centered 3″ up from the bottom of the lip of the fold over. You’ll also want to measure on the back side of the pouch 11″ up from the end of the inside top of the pouch. This will be for the hanging strap that will need to be sewn on, prior to completing the pouch. The strap is 3/4″ wide and you’ll have to determine the length, to suit yourself. Mine was 19″, allowing for a 3″ loop at the top and a little extra hanging down. You can see what it looks like in the photo.
 The next part involves using a pounce wheel and marking all the holes you’ll need for stitching and then punching them out. I will assume you are familiar with leather working tools, as this is not a project for beginners. If you’re a bit crazed, you can use some thin leather and sew the top side edges of the pouch with a contrast piece.
You have some options here…you can dye the pouch before sewing it, which might be easier, or do it after everything is completed. Because I like doing things the hard way, I did it after.
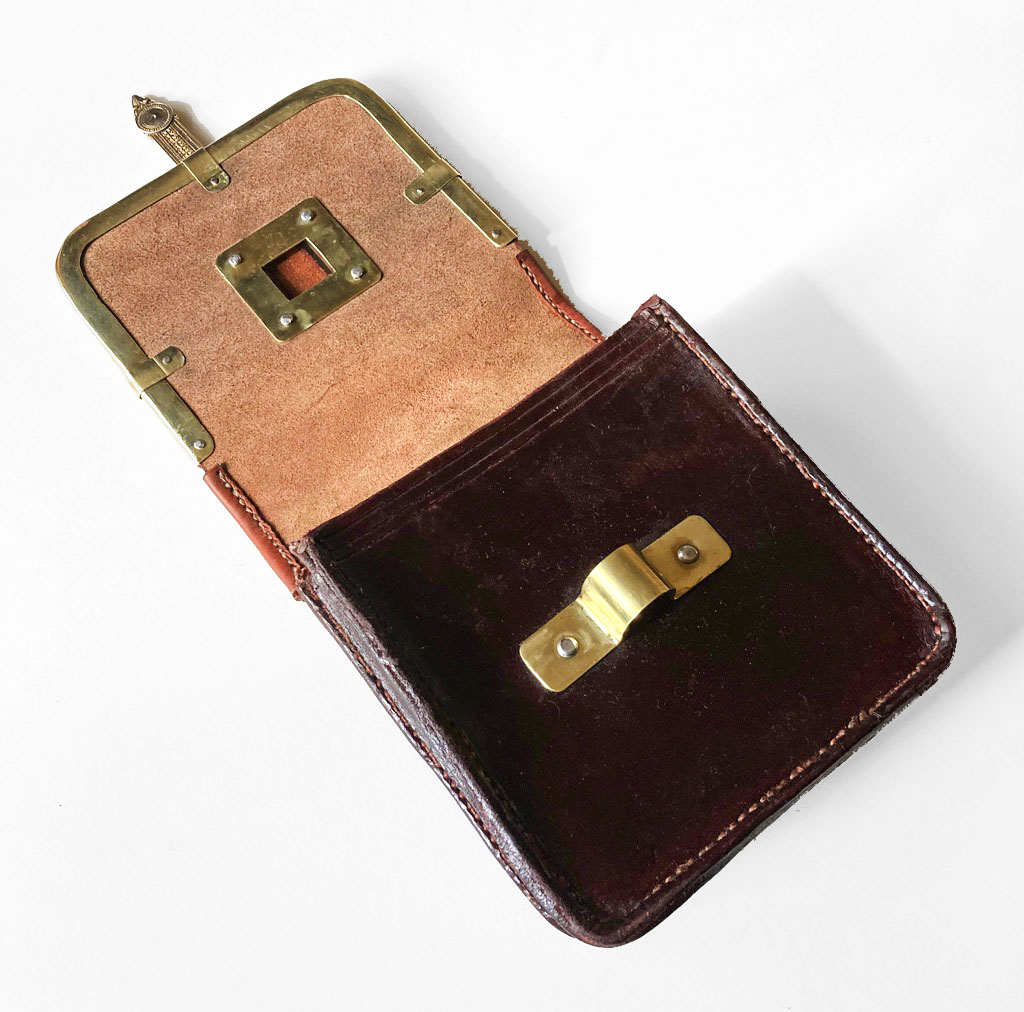
 So, now you have all your leather parts. Time to get into the metal bits…brass, that is. I think I used 16-18 ga. brass for all items. Brass or steel rivets are available on the internet. Depending on how you want to set up your pouch, you may have 2 U-shaped pieces of U-channel that you must shape or one, if you skip the inside front panel, as I did. You’ll also need to cut some plates. I think they were 2 1/2″ x 2 1/2″. Don’t forget to cut the square holes in the center. If your strap is 3/4″, cut a bit more from the center to allow the metal loop that you will fashion to pass through. Also, do give it enough height so that your strap and end fitting will pass through easily. I used an Irish belt fitting for my strap end. Make a paper template of your metal parts so you can get the dimensions you need without wasting metal. You’ll need to figure out how tall you want the loop to be and how long the total length of the metal loop strip will be. There will also be a backing plate for the loop and a backing plate for the pass through piece. You might wish to install these prior to sewing. Last, you’ll need to make your U-channel pieces and bend them. I was told to make a metal form the same thickness of the leather and bend the brass around it to get the proper shape, using a cold forging technique with frequent annealing. That didn’t work for me and I wasted my first attempt. Second attempt went much better because I fired up my forge and hot forged the pieces. So much easier to work that way, using a combination of the form, my post vice, anvil and hammer. Then, finishing it all off on the buffing wheel. The small brass U-clips were easy to do, cut to shape, drill and bend.
I want to say, “Kids, don’t try this at home!” It was a frustrating project due to the metal work, but once I got the hang of it, things went pretty smoothly. If you’re handy with tools and willing to invest some time, you should do just fine.
I’m really happy with the results. I re-dyed my scabbard, long seax and seax sheaths to match the pouch and now have a great looking matching set.