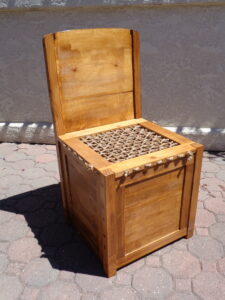
REPLICA OSEBERG CHAIR
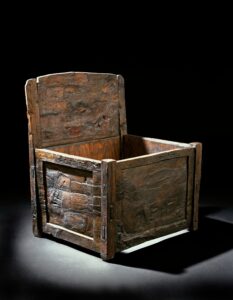 In 2018, I decided that due to ongoing back issues, I would need something to sit on at reenactment events that gave me some measure of back support. I was familiar with the Oseberg chair from my studies of the Oseberg ship and its contents. However, the Oseberg chair’s dimensions fit that of a child, not a 6′ 2″ male. The seat height was about 15 inches. Standard seating height for modern chairs is about 18 inches. I knew I had to do some upscaling if I were to make this chair.
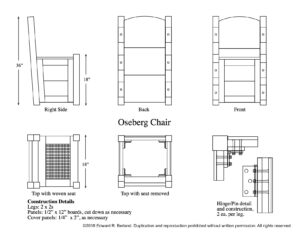
The other thing I wanted to do was to make it store flat, for easier transportation and storage. With this in mind I began sketching out ideas based on a previous iteration of the chair from another individual. My plans are below on the left and the parts list is next to them in this narrative.
 There are also others who have built Oseberg chairs. For your convenience, I have included a couple of other sets of plans. See the link for a PDF of the chair HERE. There is also another set of plans for the chair I found on the internet. I have no attribution for it, but would be glad to add one. The link for it is HERE.
My criteria for the replica Oseberg chair was that it either fold flat or be made of individual pieces that could be stacked and transported or stored. After numerous attempts, I finally arrived at a solution and began to draw out plans in earnest.
Once the plans were complete, I enlisted the aid of Jack Garrett, Jarl of The Vikings of Bjornstad. He had a table saw, actually a radial arm table saw and a drill press…a critical element for my construction process. I did not want to try to cut precisely with my meager hand saw. Besides, Jack is a wizard at math and there were a few angles that had to be figured. I was asleep during geometry class…evidently, Jack was wide awake.
We made plans to meet at his house, buy the lumber locally and work in his garage. One of my good ideas. I didn’t want sawdust in my garage OK, kidding, my friend! Actually, things went really well and we probably cut out most of the wood necessary to build the chair. I am indebted to him for his time and math skills.
Replica Oseberg Chair Materials List:
2″ x 2″ – 10 ft. (2@36″, 2@18″) – Clear
12″ x 1″ – 6 ft. (3@20″)
8″ x 1″ – 10 ft. (4@18″, 2@20″)
2″ x1″ – 16 ft. (4@18″, 2@20″, 6@16″) – Clear
4 Sets Hinges
Flat head wood screws
Wood Glue
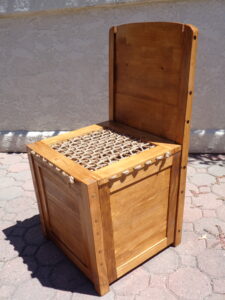 There was more cutting of wood and a good portion of the construction that was done in my garage. No need to hear about that except that it involved long wood screws, deep holes, wood glue and wooden plugs. Yeah, I made it look like it was put together with wooden dowels. Except, it’s not! The secret is in the detail on the bottom right of my plans for the chair. I used door hinges on the inside sections of the chair. It is literally held together by the pins that hold the hinges to one another. And, that allows me to separate the panels and lay them flat for storage. Interestingly, I came up with the hinge plan independently of the knowledge of the previously mentioned other chair plan. Great minds, one would think!
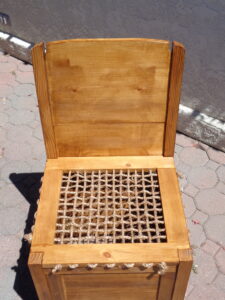
Anyway, here are some pictures of the chair I made, with Jack’s assistance. It would have taken me far longer without his help. Maybe, I should let him sit on it sometime.
The chair is quite comfortable with a 5 degree rake to the back and the seat with the rope webbing works well, especially, if I sling some reindeer hide over it.
_____________________________________________________________________
Oseberg Chair image ©Museum of Cultural History, University of Oslo / Eirik Irgens Johnsen
Replica Oseberg Chair Plans ©2022 Ed Berland. All rights reserved. Duplication and reproduction prohibited without written permission.


