GJERMUNDBU HELMET AVENTAIL & LINER
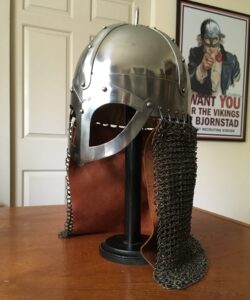 I‘ve owned three versions of the Gjermundbu helmet. When I purchased this version of the helmet (#3), I was endeavoring to up my “reenactor game”. At the time, it was the most accurate helmet I could find. As I’ve gotten deeper into reenactment and learned more about the era I’m reenacting, I’ve discovered that what was “close” is really not good enough. So, I recently purchased my fourth helmet. The pictures look good and I’ve had the opportunity to handle a similar helmet owned by a fellow reenactor. Now, I’m just waiting for the fourth helmet to show up. It’s an exact replica (promises the maker)…and looks to be worth every penny I paid for it. By the time you read this, I may actually be in possession of it.
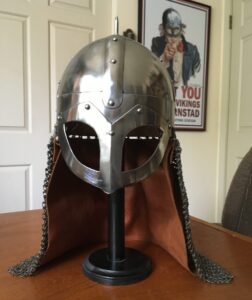 Anyway, the reason for creating this particular page is to show and tell how I changed the aventail from the older helmet that was composed of butted chainmail links to riveted links and to add a leather liner, as my hair was getting stuck in the links.
Starting with a leftover section of riveted links from when I shortened the arms on my byrnie, I measured the old aventail. As it turned out, one of the riveted sections turned out to be the perfect match for replacing the old aventail, with no additions or link removal. The next step was to remove the old aventail by unlinking all the helmet attached butted links…easy-peasy!
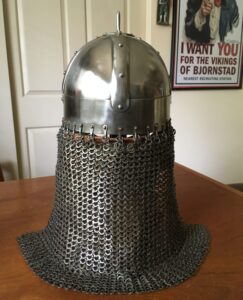
Next, I used some of the bu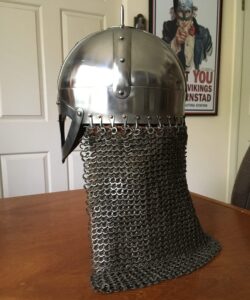 tted links to attach the riveted aventail to the bottom of the helmet at the attachment points. This went pretty quickly and the results look ok. I’m sure if I had used riveted links, the results would be even better. I did notice some snagging of the aventail on the shoulders of my riveted chainmail byrnie. A close examination of the aventail showed long rivet lengths that were catching in the rings of the byrnie. At that point, I realized a leather liner would serve a dual purpose. One to prevent hair snags and two, to prevent chainmail snags. It’s not fun when trying to turn one’s head in a helmet and the helmet doesn’t want to move.
 Constructing the leather chainmail liner was an interesting process. I first took the vertical and horizontal measurements of the aventail. Then I transferred them to a thin piece of suede leather I had laying about. I added an extra inch to the top of the suede piece, as I was going to fold it over at the one inch mark and sew in a piece of stainless steel wire that I had purchased. I left the wire longer than the width of the liner to be able to temporarily remove it. The reason for the removal was to allow me to punch holes that corresponded with the anchor points on the helmet that were used to hang the aventail.
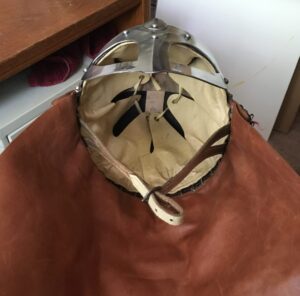 Inverting the helmet, I placed the liner on the attachment points and threaded the wire through them, anchoring the liner to the helmet. Once I completed that task, I cut off the excess wire and stitched the ends closed to prevent the wire from working itself out from the liner.
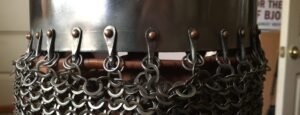 I’m pretty satisfied with the outcome of this project. If I were keeping the helmet as a primary piece of Viking kit, I would replace the butted links with riveted links.


